Singleton Pattern is a type of Creational Design Pattern in iOS, which holds a leading position in the list of Top Swift Design Patterns for iOS in 2022. This Pattern restricts the class to only one instance. So, every time you refer to the class the same underlying instance will be returned.

The diagram shows that a particular class will be creating a Static property or a Static field. By virtue of that, now the class will return you the instance of that particular singleton. This is called the basic Singleton or the Default Singleton, which means it does not allow you to create any further new instances. Instead, it provides a global point of access across the system. Singleton Pattern is a type of Creational Design Pattern in iOS. This Pattern restricts the class to only one instance. So, every time you refer to the class the same underlying instance will be returned.
Note: Another pattern called Singleton Plus do exits that will allow you to create new instances of the Singleton if you want to.
Coming back to Singleton Pattern, it is very common in iOS development and even Apple makes extensive use of it. Some of the popular Singleton usage by Apple are as follows:

Case 1: URLSession –
//Creating a variable that holds URL
var url = URLRequest(url: URL(string: “https://something.herokuapp.com/api/login”)!)
//Setting up the connectivity followed by Closure
let task = URLSession.shared.dataTask(with: url,completionHandler: handle( data: response: error:))
// Invoking the Network call
task.resume()
Case 2: UserDefaults –
// Creating an Array
var myActivity = [String]()
//Creating a Key-Value and then save it
UserDefaults.standard.set(myActivity, forKey: “activity_List”)
// Fetching the data back based on Key
if let data = UserDefaults.standard.object(forKey: “activity_List”) as? [String] {
myActivity = data
lbl_caption.text = “There is a pending activity”
}else {
lbl_caption.text = “Currently there is No Activity present”
}
// Removing
UserDefaults.standard.removePersistentDomain(forName: bundleID)
Case 3: NotificationCenter–
//Created a notification variable globally for the class and it will keep of observing
// and when it’s true, notification will give call to the method keyboardWillShow()
NotificationCenter.default.addObserver(self, selector: #selector(keyboardWillShow(notify: )), name: UIResponder.keyboardDidShowNotification, object: nil)
Case 4: NotificationCenter–
// img_folder will refer to a Folder path
var img_folder: URL!
// Will provide the path to the user Document directory
guard let url = FileManager.default.urls(for: .documentDirectory, in: .userDomainMask).first else {
return
}
// append the user Document directory with the Folder path
img_folder = url.appendingPathComponent(“img_folder”)
do{
// Create the Direcory inside Document directory
try FileManager.default.createDirectory(at: img_folder, withIntermediateDirectories: false, attributes: nil)
}catch{
print(error)
}
are some of the iOS singleton implementations. Now it’s our turn ..
So now we are going to use Singleton Pattern for building an app?
In this blog, I will be building a small app, showing a list of Subject names from an Array and then displaying it in UITableViewController. So let’s have a preview of the finished app first:
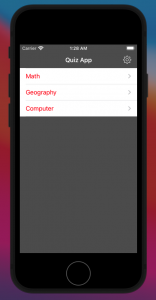
How those values are coming will see later but on the right-hand side of the navigation controller, there is a Settings button.
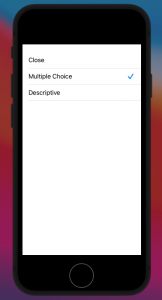
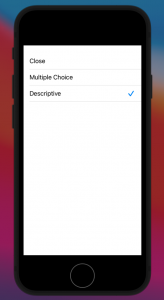
If I click on Settings, it shows another UITableViewController that has multiple options like “Multiple Choice” and “Descriptive”. A user can opt for any option, whichever option one selects will be get saved in the UserDefaults and this whole implementation will be done using the Singleton Design pattern.
Below is the preview of the Main storyboard, whereby you all will find two UINavigationController and two UITableviewController.

So, let’s create UITableviewController associated with UINavigationController. Create a Prototype cell and give an identifier for the tableView cell by the name “QuestionGroupTableViewCell”. Also, create a .swift file of type UITableViewController by the name “QuestionGroupTableViewController” and below is the code for the file.

QuestionGroupTableViewController.swift:


After successful execution, this would be the preview for the UITableViewController.
But yes, you need to create another .swift file and give the name as QuestionGroup.swift where the enum and struct have been made. Inside enum, an array of “Static” types has been created so that directly by the struct name we can call it. Then struct “QuestionGroup” has been created so that we can create later an Array of the struct type.
QuestionGroup.swift:

AppSettingsTableViewController.swift


AppSettings.swift:

Wrapping it Up
Singleton intends to ensure that a class has only one instance. It implies that a Singleton instance should be reusable. The only way to keep a Singleton instance for future reuse is to store it in a static (or global) context. So, we examined one of the most popular patterns. There are some caveats when using it, but if you’re aware of them, it’s pretty easy to use. I hope you’ll find this implementation of the Singleton Design pattern of iOS useful.
Search
I Want to Learn...
Category
Explore OurAll CoursesTransform Your Dreams
into Reality
Subscribe to Our Newsletter
"*" indicates required fields
Similar Reads
