
 1800 419 9397
 Job Oriented Training
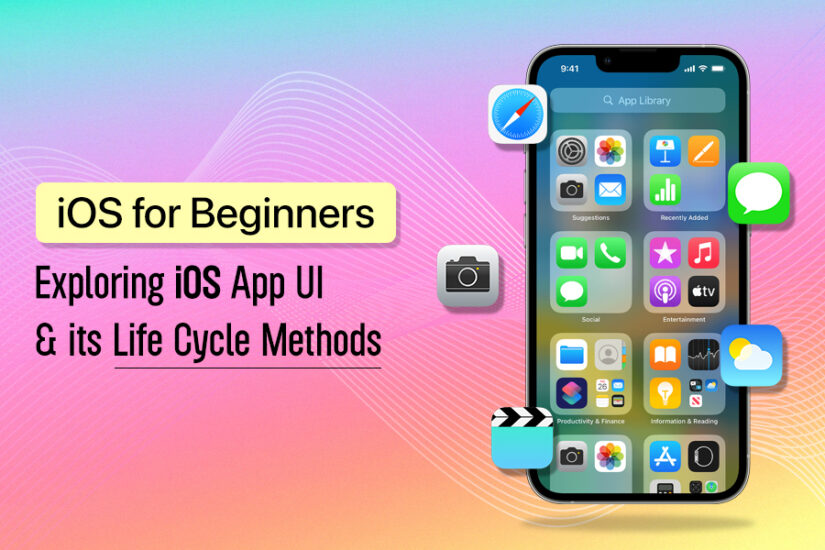
iOS for Beginners: Exploring iOS App UI & its Life Cycle Methods
Are you interested in iOS App UI and are looking for ways to understand it? Here, we have this blog for you. It entails the various aspects of App UI for iOS and its different life cycle methods. So enrolling in an iOS App Development course online is a must. It is not only the need for the profession of iOS for beginners, but is also considered to be essential if you want a flourishing career in the sector.
Here, in this blog we intend to cover the iOS UI view life cycle methods in details. Keep reading to learn the iOS basic fundamentals and enhance your knowledge base.
Table of Contents
iOS for Beginners: A Comprehensive Guide to Getting Started
Through this blog, we focus on iOS for beginners, giving them a particular idea of about the basic and standard App UI and the various methods of life cycle. Let’s check out the different points mentioned below and stay updated.
Interface builder:
Interface Builder (IB) is a Software development tool that is part of Xcode IDE. IB provides a collection of user interface objects for the app developers to use while designing the interface of applications. To make UI with the IB developer, simply drag the interface objects from the palette or collection onto a window or menu.
Storyboard:
A Storyboard can represent the visual flow of single and multiple screen designs of an application, and it is composed of a sequence of scenes, each of which represents a view controller and its views; the scenes are connected by segue objects, which represent a transition between the two view controllers.
If you are getting trained for the iOS development for beginners, you must probably have learnt about the storyboards. On an iPhone, each scene corresponds to a full screen’s worth of content; however, on an iPad, multiple scenes can appear on the screen at once, using the popover view controllers. Each scene has a dock, which displays the icons representing the top-level objects of the scene. So mastering storyboards is crucial for beginners pursuing an iOS development career as it allows for efficient screen management and navigation within the app interface.
The dock is used primarily to make the action and the outlet connections between the view controller and its views.
The reason why it’s called a storyboard is that it tells the story of your app designs and flow in terms of segue and scenes, which could have a little difference in the view as per the size of the screen in which you are viewing the app. Take a look at the following storyboard, which shows the user flow of the app as well as how each view is connected with other views in the app, as shown in Figure 1:

In the preceding figure, you can see a developed app with a storyboard that has some view controllers interconnected in a continuous flow, either navigated from the segue or with the program code.
View controller scene:
To set up a project with a storyboard initially while creating your project, you need to select the Interface option as Storyboard and Life Cycle option as UIKit App Delegate with the language option Swift, as shown in Figure 2 as follows:

Moreover, when the Xcode window is opened for the project, you will find the following files auto-created by IDE:
. AppDelegate.swift
. SceneDelegate.swift
. ViewController.swift
. Main.storyboard
. Assets.cassettes
. LaunchScreen.storyboard
Here, the Launch screen storyboard is used as a launch page screen which is not part of the actual app flow, and it will appear for as long as the app takes time to start the app to show its first screen. The Main.storyboard (by default) contains the start point of the app as well as the first screen of the app, which is in general termed as the View Controller Scene. The Initial View Controller Scene represents and contains the view controller, first Responder, next moving flow, and the storyboard “Entry point”.
Every Storyboard contains a single-entry point. Whichever screen is pointed by the storyboard entry point will present first on the simulator of the iOS device, as shown in Figure 3 as follows:
 - Webskitters Academy")
Using Segue:
From Segue, you can design and navigate the flow of the user interface. A segue defines a transition between the two view controllers in your app’s storyboard file. When selecting the relationship type for your Segue, select an adaptive Segue whenever possible. Adaptive segues adjust their behaviour automatically based on the current environment. For example, the behaviour of a Show segue changes based on the presenting view controller.

App Lifecycle:
The app life cycle is responsible for responding to the system notifications when your app is in the background and handling other significant system-related events. When an iOS app is launched the main function of the app is it can initiate UISceneDelegate (in case you are using Scene based user interface flow) or UIApplicationDelegate (If you are using a simple storyboard base flow).
Let’s take a look at how they can be used to start the app life cycle.
.UISceneDelegate
is implemented from and after the iOS 13-supported apps to respond to the life-cycle events in a scene-based app.
.UIApplicationDelegate
is implemented till and before the iOS 12-supported apps to respond to life-cycle events.
Responding to the launch of the app: UIApplicationDelegate
Initialize your app’s data structures, prepare your app to run, and respond to any launch-time requests from the system, as shown in Figure 4 as follows:

In Swift, UIApplicationMain class represents the main function workflow, which is required to be placed before AppDelegate Class in such a way that the main can transfer its control to application delegate implementations, which initiates the App life cycle.
@UIApplicationMain
classAppDelegate: UIResponder, UIApplicationDelegate (
var window: UIWindow?
funcapplication( application: UIApplication, didFinishLaunchingwithOptionslaunchOptions: [UIApplication. LaunchOptionskey: Any]?)-> Bool {
return true
}
funcapplicationWillResignActive(_ application: UIApplication) {
print(“applicationWillResignActive”)
}
funcapplicationDidEnterBackground(_ application: UIApplication) (
print(“applicationDidEnterBackground”)
}
funcapplicationWillEnterForeground(_ application: UIApplication) {
print(“applicationWillEnterForeground”)
}
funcapplicationDidBecomeActive(_ application: UIApplication) {
print(“applicationDidBecomeActive”)
}
funcapplicationWillTerminate(_ application: UIApplication) {
print(“applicationWill Terminate”)
}
Launch with UISceneDelegate:
Moreover, if you are using the scene in your interface, it will add two UISceneDelegate methods, one for starting a new scene session and another one for discarding a scene session, as follows:
funcapplication(_ application: UIApplication, configurationForConnectingconnectingSceneSession: UISceneSession, options: UIScene. ConnectionOptions)->UISceneConfiguration {
returnUISceneConfiguration (name: “Default Configuration”, sessionRole: connectingSceneSession.role)
}
funcapplication( application: UIApplication, didDiscardsceneSessionssceneSessions: Set<UISceneSession>) {
// Use this method to release any resources that were specific to the discarded scenes, as they will not return.
}
Respond to the app-based life-cycle events:
When the app launches, the system puts the app in the inactive or background state, depending on whether the UI is about to appear on the screen. When launching to the foreground, the system transitions the app to the active state automatically. After that, the state fluctuates between active and background until the app terminates.
In the app, the user may choose from Active state to Inactive and further either choose to keep it in the background or may terminate the app, which will lead to a Not Running state. If the app is in the background for long and the operating system requires more memory, it may lead to a Suspended state so that other active apps can use run-time memory. Refer to Figure 5 as follows:

When the app goes into the active state it first starts the View Controller, which should be shown initially as per the storyboard app marking. When you run the app, it will show a splash screen, which shows during the app start process and the control flow is further transferred to the view controller. Let’s take a look at how the view controller works as follows.
View Controller:
The view controller works as an intermediary between the views of the controller and the data which is going to appear on the view. Apple provides a class UIViewController, so whenever we make a new view controller scene, we must connect its view controller to a subclass of the UIViewController. This connection of the UIViewController subclass and the view controller scene on the storyboard ensures that your code can now communicate with the UI elements present in the scenes.
As you can see in Figure 3, in place of the Content class, ViewController is present, which is a subclass of UIViewController auto-created by Xcode IDE. Refer to the following code:
Class ViewController: UIView Controller (
overridefuncviewDidLoad() { super.viewDidLoad()
// Do any additional setup after loading the view.
}
View controller life cycle
The View controller life cycle talks about from what stages a view controller goes and what trigger is available for you to override while it gets initialized and becomes part of the application.
Let’s take a look at each view controller life cycle function which can be overridden while implementing app controllers, as follows:
- init: View controllers are initiated by the storyboard usually, and internally call initwithCoder () which you can override, if required.
- loadView: You override this method only in case you want to make your interface completely by the code instead of the storyboard or nib file. And don’t use this method unless there is a valid reason to do so.
- viewDidLoad: When this method is called, it is ensured that the views of the view controller are created, and all the outlets of the view are in place. It is a good place to start the background activity and start the network calls when the view is loaded completely.
- viewWillAppear: You need to override this method when you want to repeat a task every time a view appears on the screen; a2023/5/31 one time when pushed to the navigation stack but can appear many times as per your app flow and navigation architecture. Good examples of this case would be network calls for refreshing the data of some animation which you want to show to a user every time the view appears on the screen.
- viewwillLayoutSubviews: This method is called every time the frame changes; for example, when the view rotates or is marked as needing layout.
- viewDidLayoutSubviews: You can make additional changes here in this method after the view layouts subviews.
- viewDidAppear: This method is called when the view controller completely appears on the screen.
- viewWillDisappear: Before transitioning to another screen and leaving the view of the current screen, this method is called.
- viewDidDisappear: When the current view controller is removed from the screen and another/next view controller loads on the screen, this method of the view controller of the previous VC (not which loads recently) is called.
- deinit: You can override this method to clean the resources that the view controller has allocated that are not freed by Automatic Retain Count (ARC).
- didReceiveMemoryWarning: When the memory starts to fill up, the iOS does not automatically move the data from the memory to its limited hard disk space. It does, however, issue this warning, and as a developer, you are responsible for clearing the memory. Be aware that if the memory of your app goes over a certain threshold, iOS will shut down your app. And this will look similar to a crash to the end user.
- viewWillTransition: When the app interface orientation changes, the UIKit framework calls this method to the window’s root controller which sends this message to all its child view controllers just before the size is going to make the changes.
Now, we will have a look at how these life cycle functions can be implemented in Swift language, incorporating Swift design patterns. Refer to the following code:
overridefuncviewDidLoad() {
super.viewDidLoad()
}
overridefuncviewwillAppear(_ animated: Bool) {
super.viewWillAppear (animated)
}
overridefuncviewDidAppear( animated: Bool) {
super.viewDidAppear (animated)
}
overridefuncviewWillLayoutSubviews() {
super.viewWillLayoutSubviews()
}
overridefuncviewDidLayoutSubviews() {
super.viewWillLayoutSubviews()
}
overridefuncviewWillDisappear(_ animated: Bool) {
super.viewWillDisappear (animated)
}
overridefuncviewDidDisappear(_ animated: Bool) {
super.viewDidDisappear (animated)
}
overridefuncdidReceiveMemoryWarning() {
super.didReceiveMemoryWarning()
}
Self vs Super keyword
If a method is overridden, then self can be used to access the method in the subclass otherwise for accessing the super class from a base class, the best practice is to use super.
Override keyword
When a subclass provides its custom implementation of an instance method, type method, instance property, type property or subscript, it would override otherwise it can inherit from a superclass. And while customizing the implementation of the instance method, the override keyword is used in front of those functions of the superclass.
Willing to learn best iOS App Development course online/offline?
Enrol with Webskitters Academy today. It is the best institute to provide you with the best training for iOSApplication. With expert and experienced trainers and state-of-the-art infrastructure, this institute guarantees to provide you with excellent information that enhances your knowledge and offers you with excellent career prospects.
Stay tuned for the upcoming blog, where you will learn more about the iOS UI components, and how it is added to the Storyboard to make the app appealing and much more user-friendly.